Wifi Pineapple – Installation in VMware Virtual Machine
 Zeynep Sıla Orsa
Introduction
This article explains how to set up the WiFi Pineapple device securely in an isolated virtual environment, connect it to a computer, and perform the necessary software configurations. You can read our related blog post to find out more about the WiFi Pineapple device.
Requirements
Before starting the installation, the following components must be ready (the components in the first three items are included in the device box):
- Wifi Pineapple VII device
- USB-C connection cable
- Antenna set
- Host machine with VMware Workstation installed
- OS installed in the virtual machine.
Setup
Physical Setup
- Screw the device’s antennas into the relevant ports to mount them.
- Connect the device to the computer using a USB-C cable.
- Wait for the device to boot up, which involves waiting for the LED lights on the device to stop flashing blue-green.
- When the device reaches the ‘Ready’ state (when the LED light is blue only), proceed to the next step.
Creating a VMware USB connection
The process of disconnecting the device from the host computer and transferring it to the virtual machine is as follows:
- Go to the active Kali Linux virtual machine window in the VMware interface.
- In the ‘Settings’ section for Kali Linux, go to the ‘USB Controller’ tab.
- Update the default setting of USB 2.1 to USB 3.1.
- Open the VM > Removable Devices menu.
- Select ‘ASIX Driver’ from the list.
- Select the ‘Connect (Disconnect from Host)’ option to connect the device to the virtual machine.
Network Configuration and Internet Sharing
Once the device is connected to the virtual machine, follow these steps to confirm that the hardware has been detected by the operating system and to configure the IP settings:
- Network Interface Detection: The name of the newly added network interface was checked by running the ‘ip addr’ or ‘ifconfig’ command in the terminal. This network interface is named eth1 or usb0.
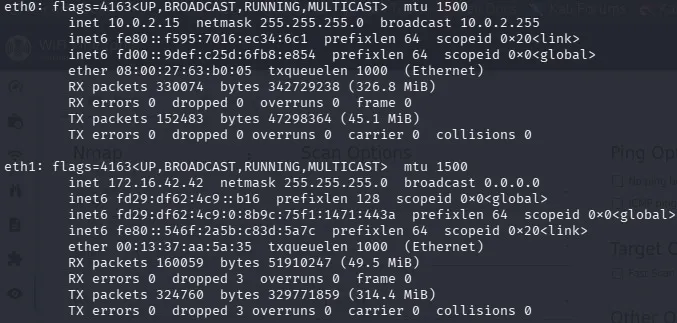
- IP Assignment: For the device to connect to the internet and receive module/firmware updates, the virtual machine’s internet connection must be redirected to the USB interface. The wp7.sh script file, developed by the manufacturer Hak5, is used to automate this network configuration.
- Downloading the File: The file can be downloaded by entering the command curl -LO https://downloads.hak5.org/wp7.sh in the terminal. Alternatively, it can be downloaded directly from the website on the operating system.
- Permissions: If you are not using the root user, grant the script execution permission with the command chmod +x wp7.sh.
- Starting the Script: Run the downloaded script via the Terminal using the command ./wp7.sh. If you are not the root user, run it using the sudo command.
- Setup: After running the command, the terminal interface of the Wifi Pineapple device will appear:
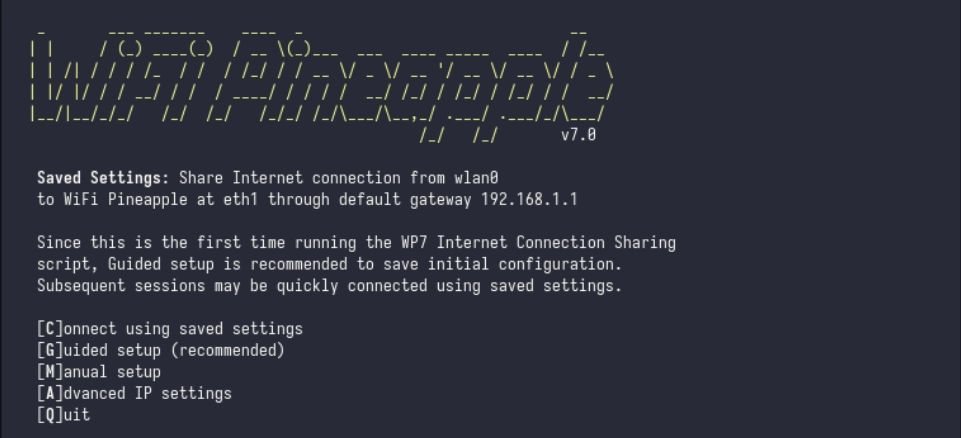
Select G mode at this stage. This is the Guided Setup option. In this mode, the ICS script will attempt to automatically determine which interface is the WiFi Pineapple and what the current network settings are. After selecting this mode, follow the instructions below:
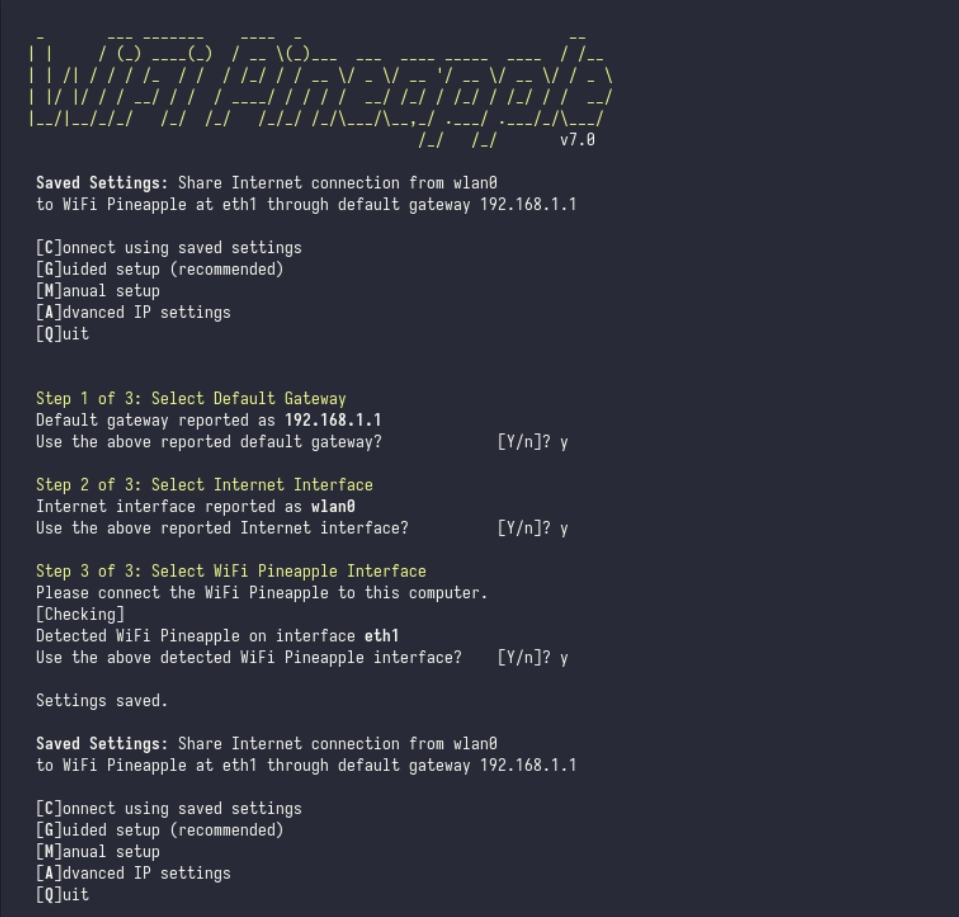
Once you have completed all the steps, select C mode to save the settings. This mode maintains the connection with the saved settings.
Accessing the Management Interface and Initial Setup
Once the network configuration and internet sharing have been successfully completed, access to the device’s web-based interface is provided:
- Open the web browser on the virtual machine and enter http://172.16.42.1:1471 in the address bar. This address is the default HTML address for the Wifi Pineapple device’s internet interface.
- Once the “Setup Wizard” screen has been opened, set a password for the device’s root.
- Once the root password has been set, the menu for creating the Management AP and Open AP will become visible. The Management AP settings are configured to enable wireless management of the device. A Management SSID and password have been set. For security reasons, it is recommended that the setting be changed to “Hidden”.
Firmware Update
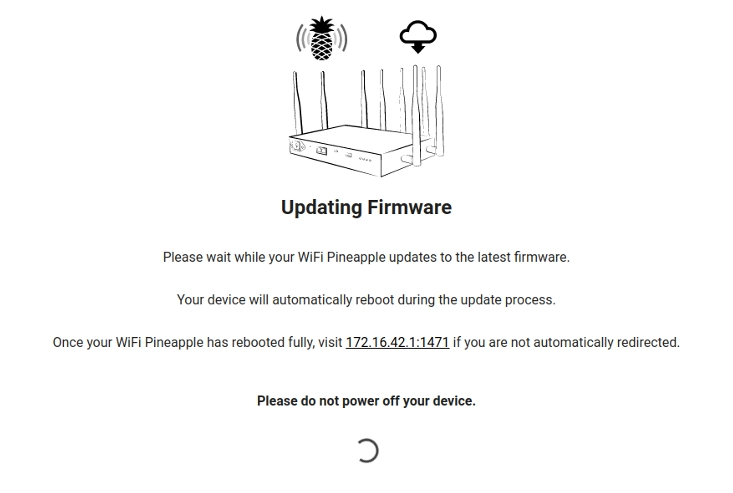
In order to ensure that the device operates in the most current and stable state, it is necessary to perform a software update. Once installed, the device will automatically update itself via the interface selected.
Testing and Validation
System Resource Control and Dashboard
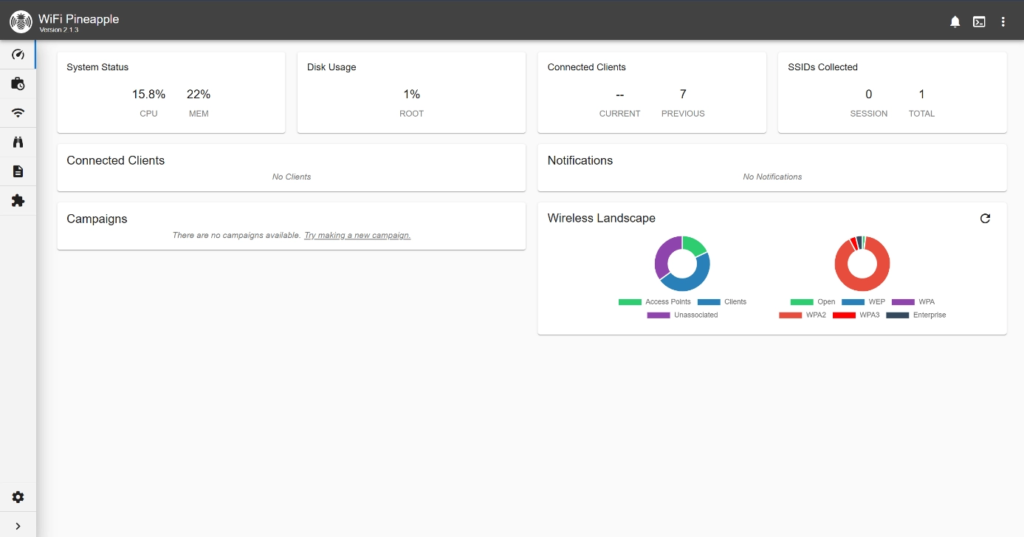
When accessing the management panel, it can be seen that the CPU and RAM usage values are at normal levels and that the internet connection is active in the “Bulletins” area.
Recon
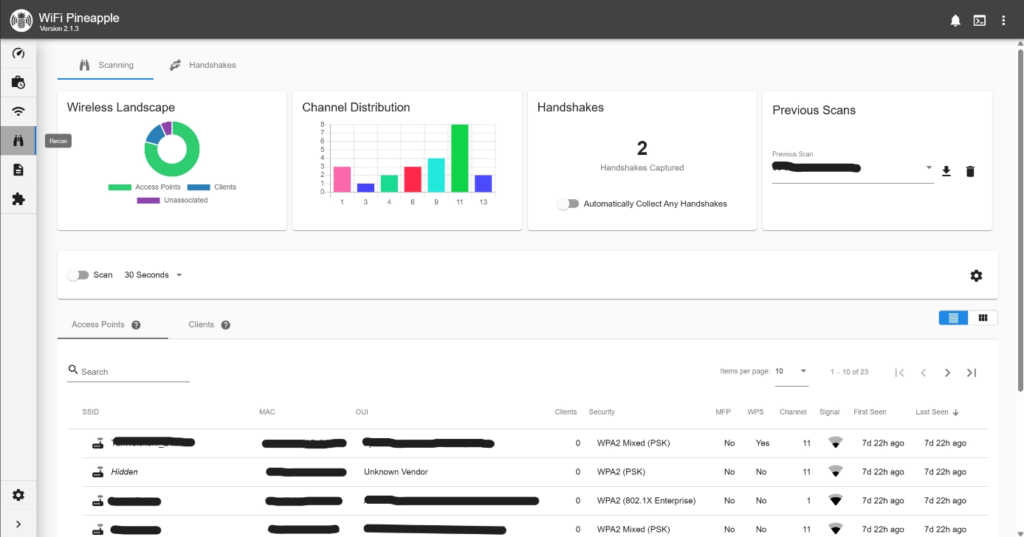
To verify that the device’s wireless network cards are listening to the environment, a scan is performed via the “Recon” module. The scan results confirm the list of available APs in the environment, along with the MAC addresses, SSID information, and signal strengths of the client devices connected to them.
Congratulations! Your device is now ready for use.
The Wifi Pineapple device was installed via a virtual machine, and the necessary network configurations were made to connect the device to the internet.
It has been confirmed that the device is operating stably with the latest firmware version. In addition, the management interface can be accessed without any issues, and the wireless network discovery function is working successfully. The device is now ready for use in pentest scenarios.
Bibliography
https://docs.hak5.org/wifi-pineapple/images/wifi_pineapple_mk7_2022_06_v1x.pdf
https://docs.hak5.org/wifi-pineapple-enterprise/setup/physical-connections
https://docs.hak5.org/wifi-pineapple/setup/connecting-the-wifi-pineapple
https://docs.hak5.org/wifi-pineapple/setup/setting-up-your-wifi-pineapple
About the author
Zeynep Sıla Orsa
Network Hunter
Subscribe to the newsletter
New cybersecurity articles, research and hardware-lab notes — straight to your inbox.
Related articles

MouseJack Attacks and RF Signal Analysis in nRF24L01+ Chips

Rolling Code (KeeLoq) Cryptography and RollJam Attack Architecture in Wireless Access Systems